fabric
Package examples/directory
The directory.example microservice is an example of a microservice that provides a RESTful CRUD API backed by a SQL database.
For the sake of this example, if a connection to the SQL database cannot be established, the microservice emulates a database in-memory.
Adding SQL Support
It takes a couple of steps to add SQL support to a microservice.
Edit service.yaml to define a configuration property to represent the connection string.
configs:
  - signature: SQL() (dsn string)
    description: SQL is the connection string to the database.
Then run go generate to create the svc.SQL() method corresponding to the SQL configuration property.
go generate
Next, define the database connection db *sql.DB as a member property of the Service.
import _ "github.com/go-sql-driver/mysql"

type Service struct {
	*intermediate.Intermediate // IMPORTANT: DO NOT REMOVE

	db *sql.DB
}
Open it in OnStartup.
// OnStartup is called when the microservice is started up.
func (svc *Service) OnStartup(ctx context.Context) (err error) {
	dsn := svc.SQL()
	if dsn != "" {
		svc.db, err = sql.Open("mysql", dsn)
		if err == nil {
			err = svc.db.PingContext(ctx)
		}
		if err != nil {
			return errors.Trace(err)
		}
	}
	return nil
}
And close it in OnShutdown.
// OnShutdown is called when the microservice is shut down.
func (svc *Service) OnShutdown(ctx context.Context) (err error) {
	if svc.db != nil {
		svc.db.Close()
		svc.db = nil
	}
	return nil
}
Connecting to the Database
This example requires a MariaDB database instance. If you don’t already have one installed, you can add it to Docker using:
docker pull mariadb
docker run -p 3306:3306 --name mariadb-1 -e MARIADB_ROOT_PASSWORD=secret1234 -d mariadb
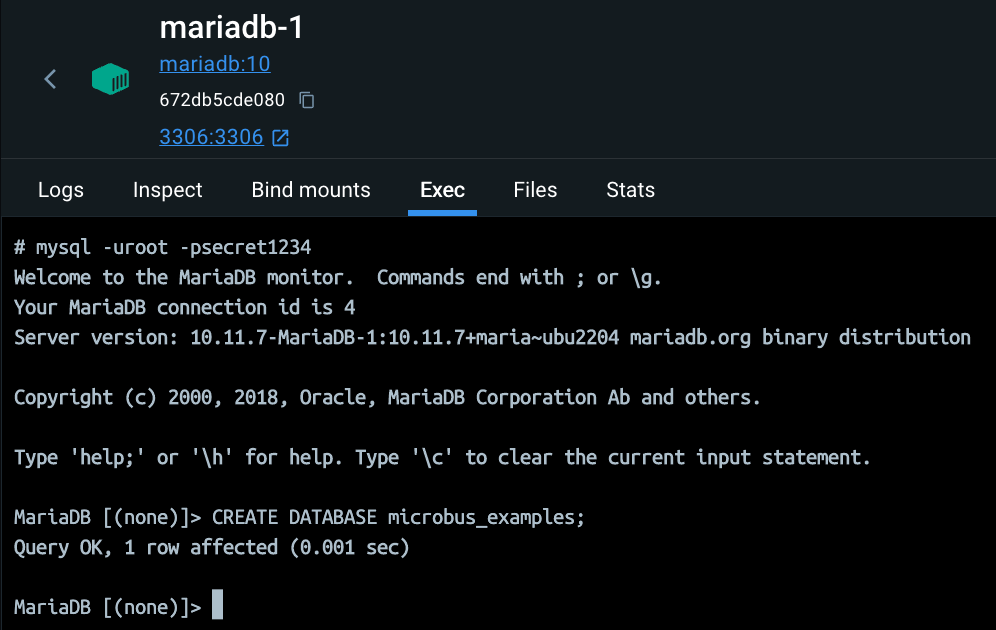
Next, create a database named microbus_examples.
From the Exec panel of the mariadb-1 container, type:
mysql -uroot -psecret1234
And then use the SQL command prompt to create the database:
CREATE DATABASE microbus_examples;

The connection string to the database is pulled from main/config.yaml by the configurator and served to the directory.example microservice. Adjust it as necessary to point to the location of your MariaDB database.
directory.example:
  SQL: "root:secret1234@tcp(127.0.0.1:3306)/microbus_examples"
Web UI
The directory microservice uses a RESTful API style rather than RPC over JSON. A RESTful API leverage HTTP methods other than just GET, which are impossible to call directly from the browser’s address bar. To circumvent this restriction, the microservice includes a web endpoint called WebUI that provides a simple browser-like form that supports GET, POST, PUT and DELETE.
Open the web UI at http://localhost:8080/directory.example/web-ui
To create a new person in the directory POST to /persons:
{
    "email": "harry.potter@hogwarts.edu.wiz",
    "firstName": "Harry",
    "lastName": "Potter"
}
The server will respond with the new user’s key:
{
    "key": 1
}
Oops, we forgot to enter Harry’s birthday! To update a record PUT to /persons/key/1 (assuming that key 1 was assigned to Harry):
{
    "email": "harry.potter@hogwarts.edu.wiz",
    "firstName": "Harry",
    "lastName": "Potter",
    "birthday": "1980-07-31"
}
To list all persons in the directory GET from /persons. The server will respond with an array of keys:
[
    1
]
To load a record, GET from /persons/key/1 (by key) or /persons/email/harry.potter@hogwarts.edu.wiz (by email). The server will respond with the record:
{
    "birthday": "1980-07-31T00:00:00Z",
    "email": "harry.potter@hogwarts.edu.wiz",
    "firstName": "Harry",
    "key": 1,
    "lastName": "Potter"
}
To delete a record, DELETE at /persons/key/1. Voldemort would be pleased.
OpenAPI
Alternatively, use the OpenAPI document of the microservice to interact with the directory microservice. Fetch the OpenAPI document at:
http://localhost:8080/codegen.test/openapi.json
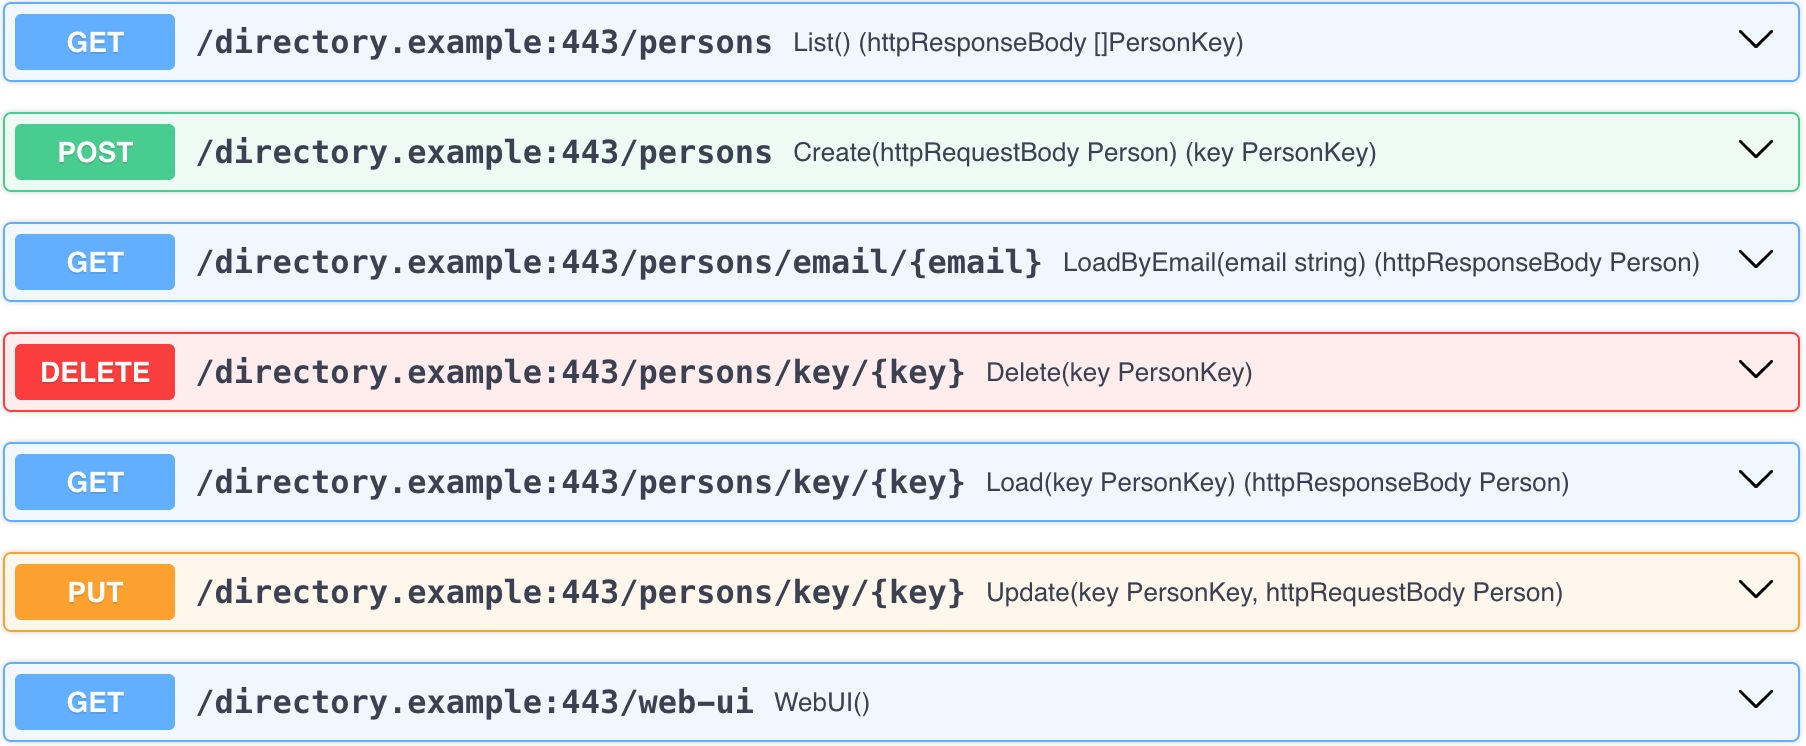
Copy the JSON and paste it at https://editor-next.swagger.io to parse it. You’ll see all endpoints of the microservices listed to the right-hand side.

Click on any of them to expand. Press the Try it out button, enter the appropriate data, and Execute.